
Aperture plays a big role in achieving the style of photographs you produce. If you shoot wide open, your photos will have a softer, dreamier feel. If you shoot closed down, your photos will be a little crisper. The subject of your photograph will often depend on the aperture you select, but before we get into that, let’s get a bit technical.
What is Aperture?
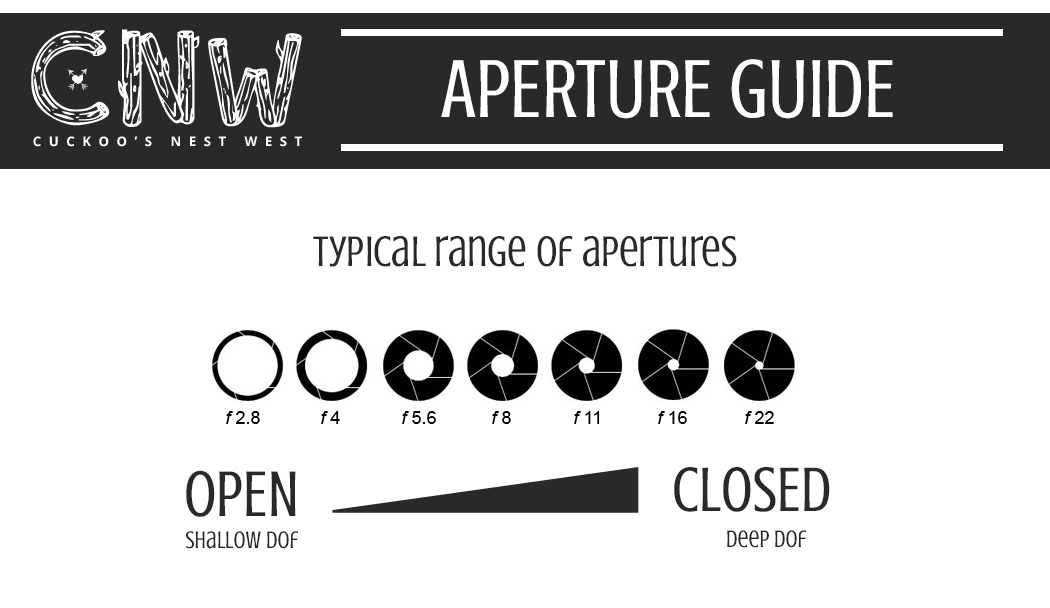
Aperture is essentially the opening of the lens. When you set your aperture, you are telling your lens how wide or how narrow you want the lens to be open, which also determines how much light gets let in. Think about it this way. If you hold your hand up to your eye and make a circle with your index finger and thumb touching, your circle will be pretty wide and you’ll be able to see more light come through. If you close down the circle, less light will come in. It’s the same thing with aperture on a camera.
If you have a camera phone like the iPhone or Samsung Galaxy, your aperture (and shutter speed) are set automatically for you. More often than not, your aperture on the iPhone is set around f/2.2. This is relatively safe depth of field, or in other words, it will make the photo’s subject in focus, and give a relatively soft background. However, if you’re taking a photo of a beautiful landscape, it will adjust so most of the photo is crisp and in focus.
How do I know what aperture to use?
That’s the question beginners will usually ask, but it’s not really the right question. Instead you should ask, what do I want to accomplish with this photo? Then you evaluate the environment.
- Where is the light coming from?
- How much available light do I have?
- Can I manipulate that light in any way?
- Where/how should I position my subject to achieve those goals?
Then you set your aperture based on your goals and the external factors.
Here’s an example
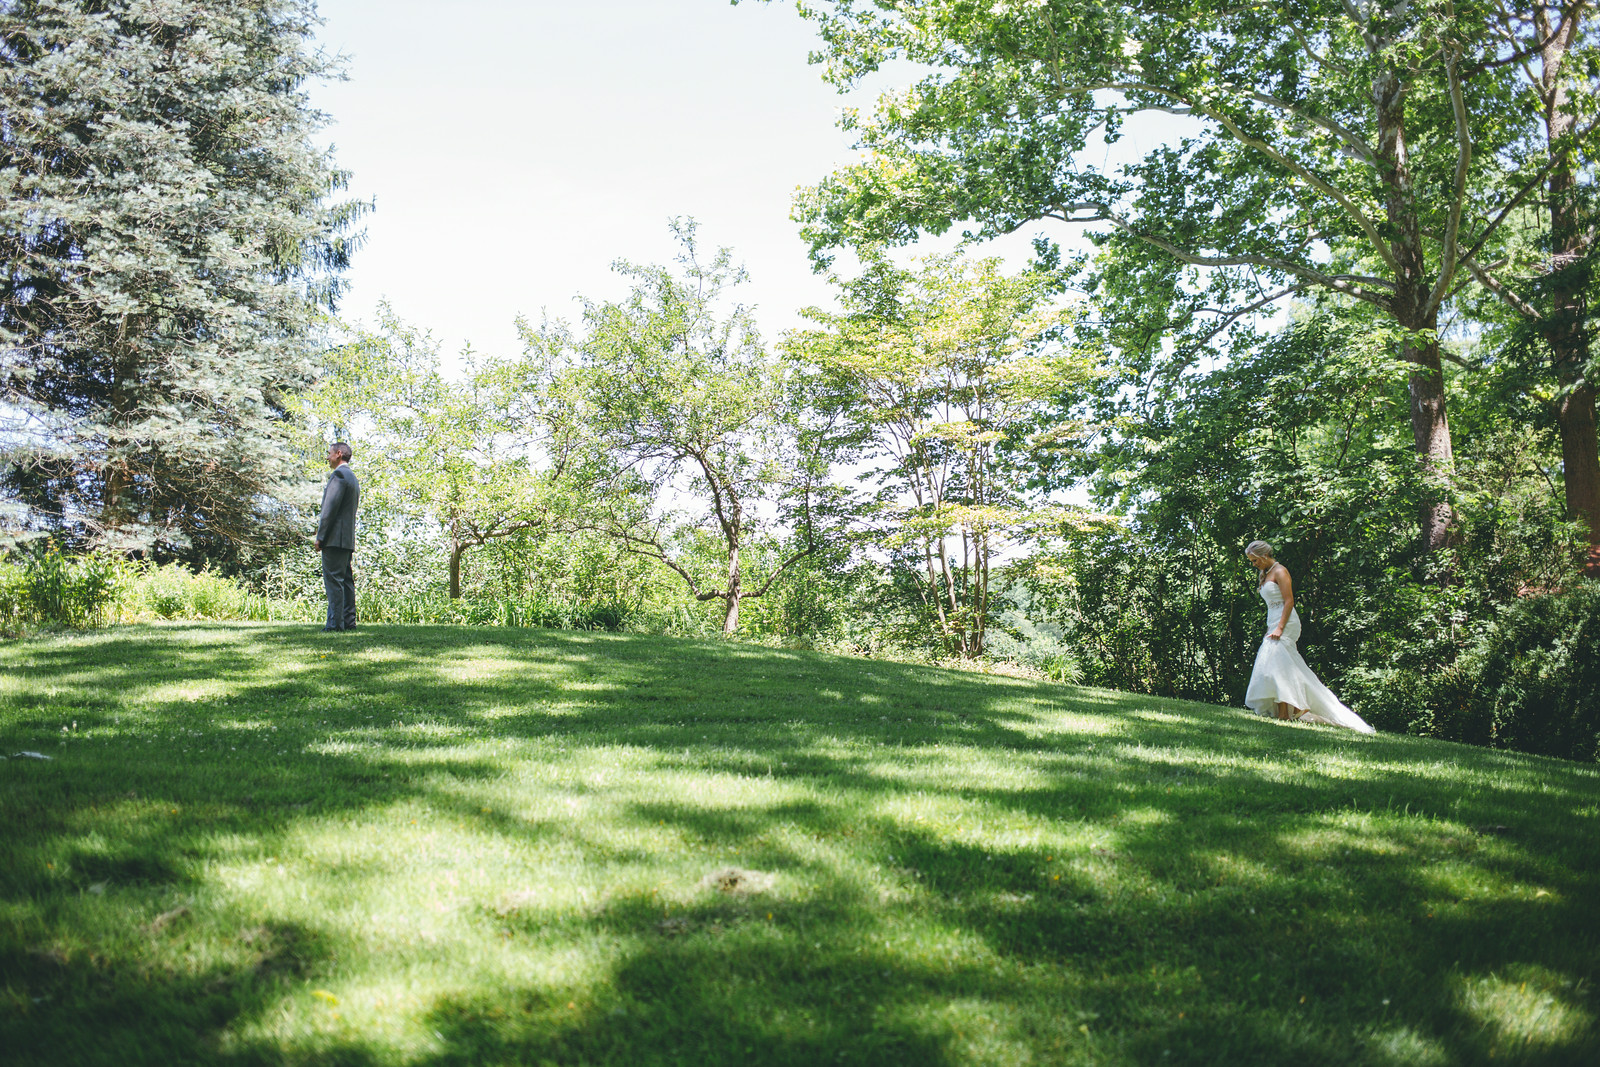
This was from a wedding we shot in Ohio this past Summer. The couple was doing a first look around midday. The sun was hot and right above us so we had to position them in the shade to avoid harsh shadows on their faces. In the first photo we wanted to establish the scene and keep everything in focus. We put the groom at the top of the hill and the bride toward the bottom. It seemed natural that she had to go up a little hill rather than down.
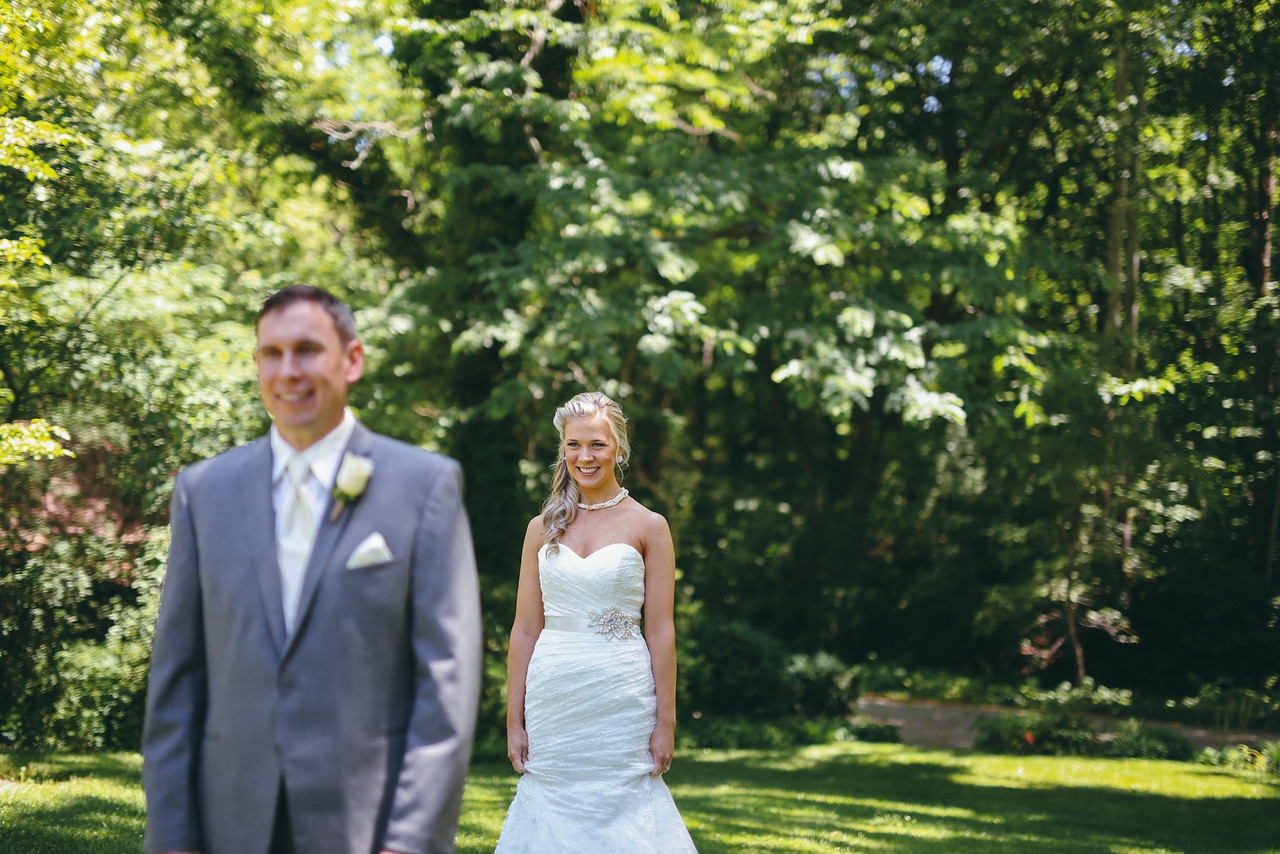
Next, we wanted to establish the emotion on his face as his bride approached him. This picture is mainly for her because without this photograph, she would never know the expression on his face before he sees her in her dress for the first time.
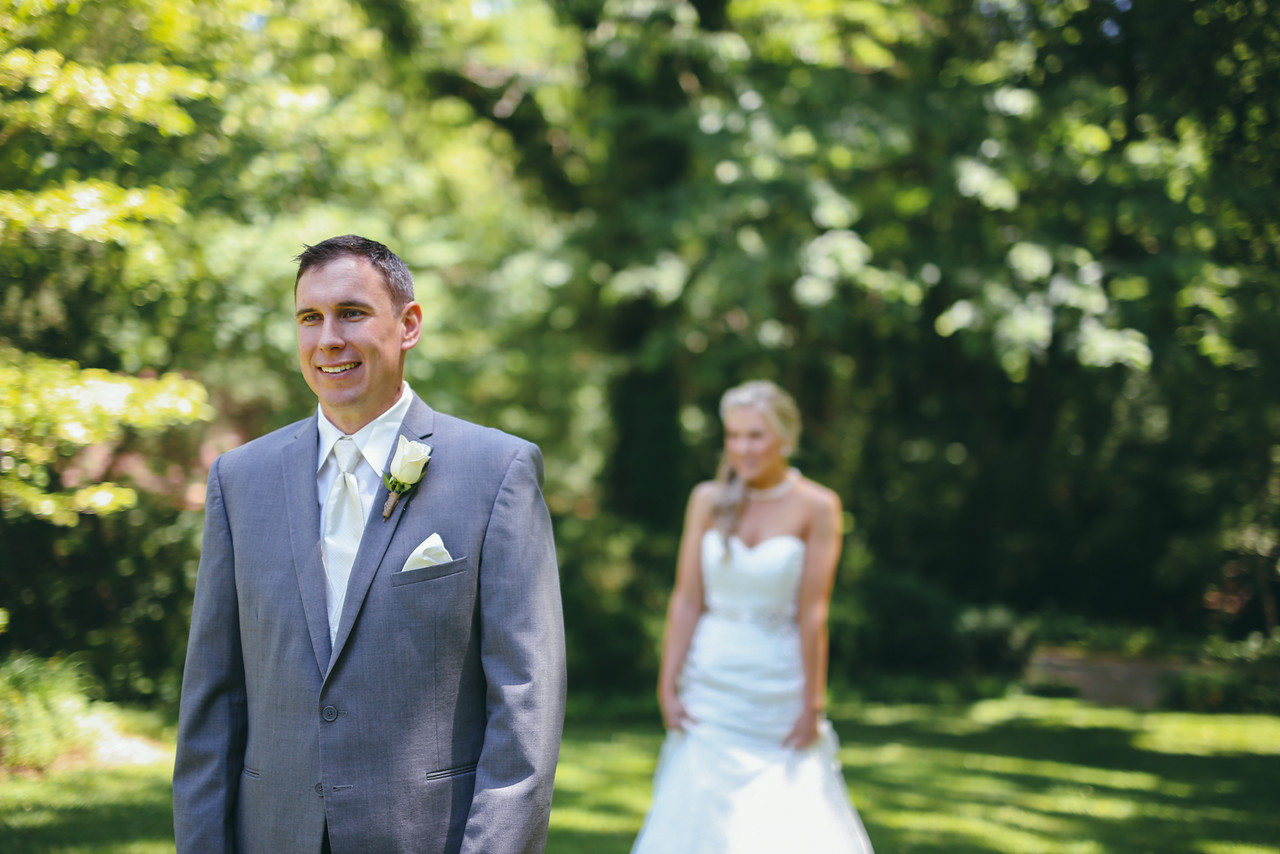
And finally, the same shot, but with the focal point switched, giving him a chance to see her expression in the photo.
Note: This is certainly not the only way you could shoot this sequence. It’s just how we choose. We feel that by using a shallow DOF and leaving only one of our subjects in focus, we are directing the viewer’s eye where we want it to go. If we used a higher aperture and a wider DOF, they would both be in focus, which tells a different story. Note: Having two photographers definitely helped tell this story.
How do I set the aperture on a DSLR?
Now that you have a better understanding of aperture, it helps to know how to set your aperture on a DSLR.
- Av mode (aperture priority), which allows you to manually set your aperture, and have the camera select your shutter speed (keep in mind, you should manually set your ISO on this setting, too) or…
- Shoot in full manual mode, which requires you to set your aperture, shutter speed, and ISO for every shot you take.
In Av mode for example, if your main goal is shooting wide open with a shallow DOF, like around f/1.4, you can set your aperture for f/1.4, and no matter what you shoot, the camera will adjust the shutter speed to give you what it thinks is the best photo. The pro of Av mode is that you don’t have to constantly adjust your aperture if you’re shooting in an environment where the light is changing often. The con of Av mode is that you lose some creative control because the camera is making decisions for you. It’s up to you to decide which works for you.
We recommend practicing in Av mode even if you never intend to shoot that way professionally because it does give you an understanding of what the camera thinks is the right setting. It’s often wrong (for lack of a better word), but it’s a good frame of reference.
Every camera will have slightly different ways to change your settings, but that can be figured out pretty quickly — what you really want to focus is understanding the concept of aperture.
