
One of our tips in our photography basics series is to take a lot of photos. It’s great advice and will make you better, but it also leaves you with a bit of problem – a lot of photos to sort through.
Often times, you can get overwhelmed and your photos are either left on the SD cards or sitting on a hard drive somewhere taking up space. We want to help you overcome that problem with a solid plan for post-production.
Introducing Photo Mechanic

Photo Mechanic is sort of like Adobe Bridge, but way better. It’s faster, can handle RAW files, and makes your culling process incredibly fast. It’s the only program we use for post production that isn’t an Adobe program — and you can try it for one month — FREE.
culling; v: selecting from a large quantity; obtain from a variety of sources.
After the 1 month it’s a one-time price of $150 – which is well worth the money. You can install it on up to 3 machines if you’re working with a more robust setup like we are (2 MacBook Pros, 1 iMac). It’s the only program you’ll need to cull through photos. Say goodbye to iPhoto or anything like that – it’s just not worth the hassle.
After you download and install photo mechanic, getting started is really simple. First open Photo Mechanic.
- When you insert your SD or CF card, you will see an ingest window pop-up. X out of that.
- Go to file, “New Contact Sheet Tab”
- On the left dock, find your SD card, and open the folder where your photos are stored
You’ll get something that looks like this:

- From there, sort by capture time, which is an option just above the photos. As documentary style photographers, we always prefer to organize by the date/time the photos were taken. You may find a different method of sorting works for you, but it’s logical for us to do it this way.
- Next, double click on the first photo so it opens in a larger window. Culling on the biggest screen possible will help you select the best photos.
- Now is the time to decide which photos to keep and which to get rid of. A tip here about this part: Trust your first instinct, but error on the side of inclusive. You can always delete later, but if you leave a photo out of the initial selection process, chances of you going back and finding it later are pretty low.
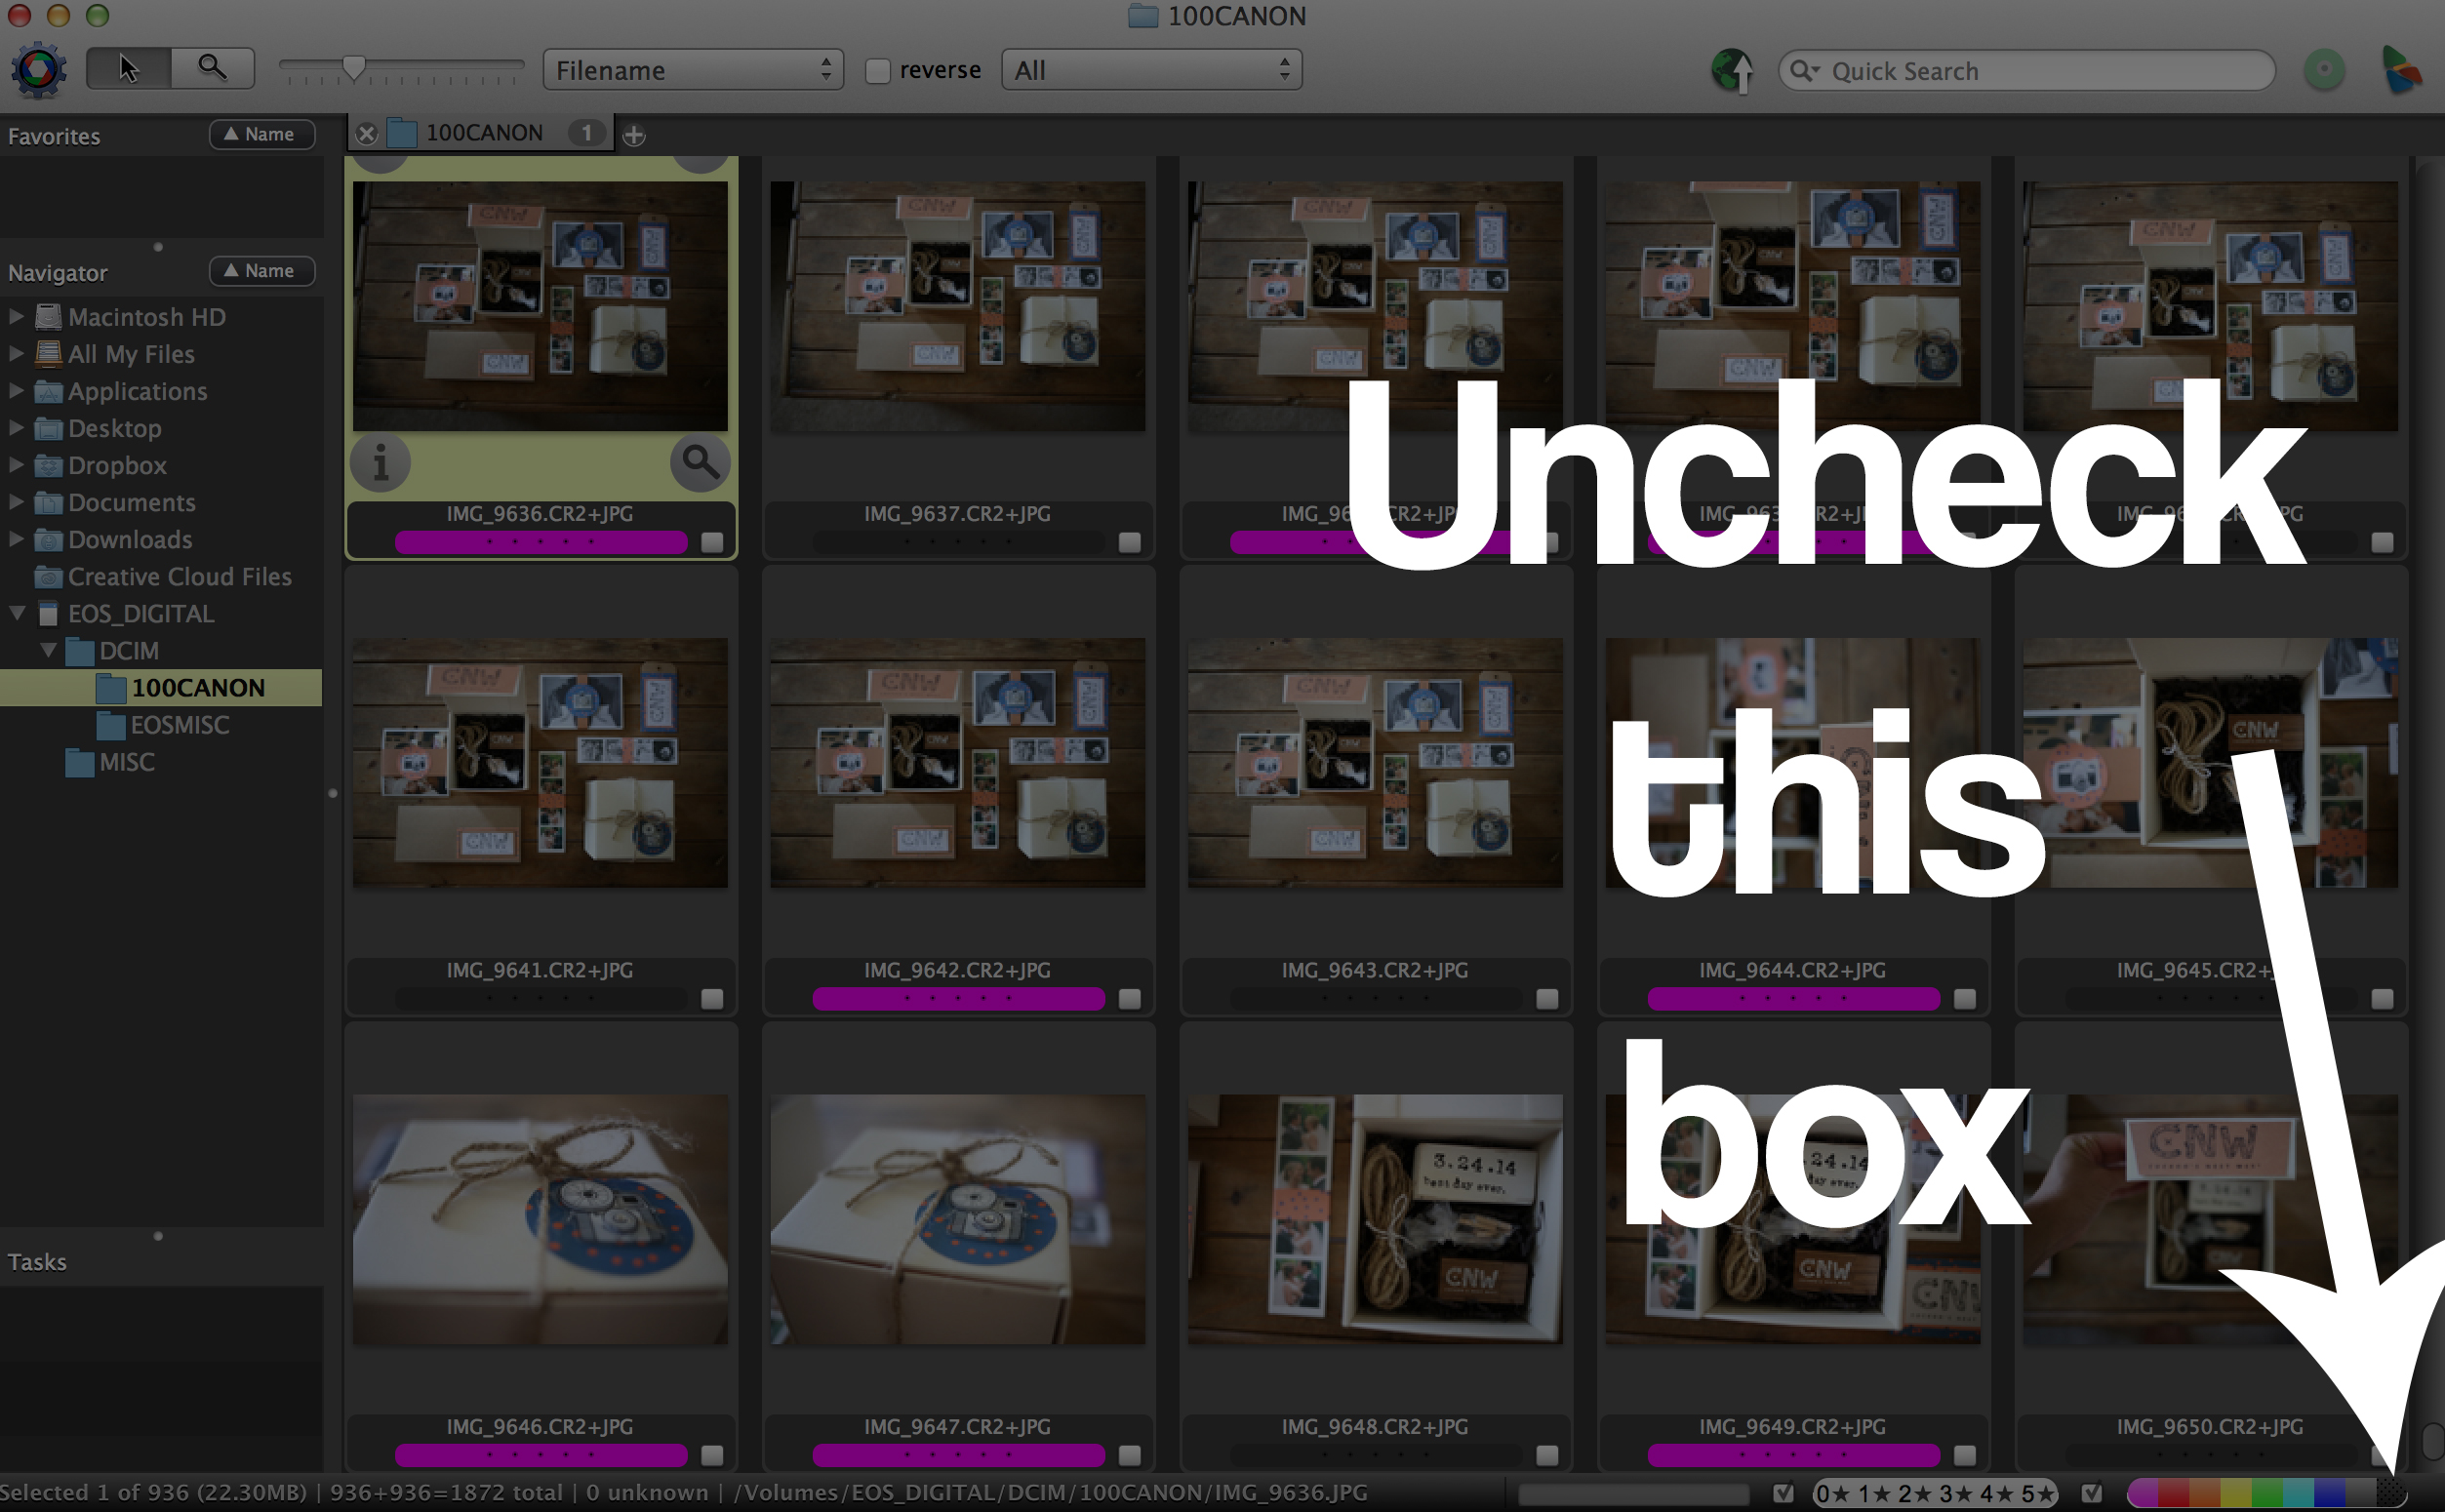
- This is the most important part. Start with the first photo, if you want to keep it, PRESS 1. This will highlight it pink. If you don’t, just skip it and move to the next photo. You continue this process all the way through until you get to the end of the SD Card. By the end, your window in photo mechanic might look something like this:

- Now, you have all the photos you want to keep highlighted in pink. Next we want to remove all the photos we didn’t mark pink. Do this by clicking the black box in the bottom right hand corner where the gradient of color is (see screenshot).
- That will leave you with a window of only the photos you want to keep. From there, hit “Select All” or “Command A” if you’re on Apple. With them selected, drag them into the appropriate folder on your external HD or wherever you keep your RAW unedited images. You’re going to be working with these in Lightroom. (For more details on how we store photos, check out this post on organization).
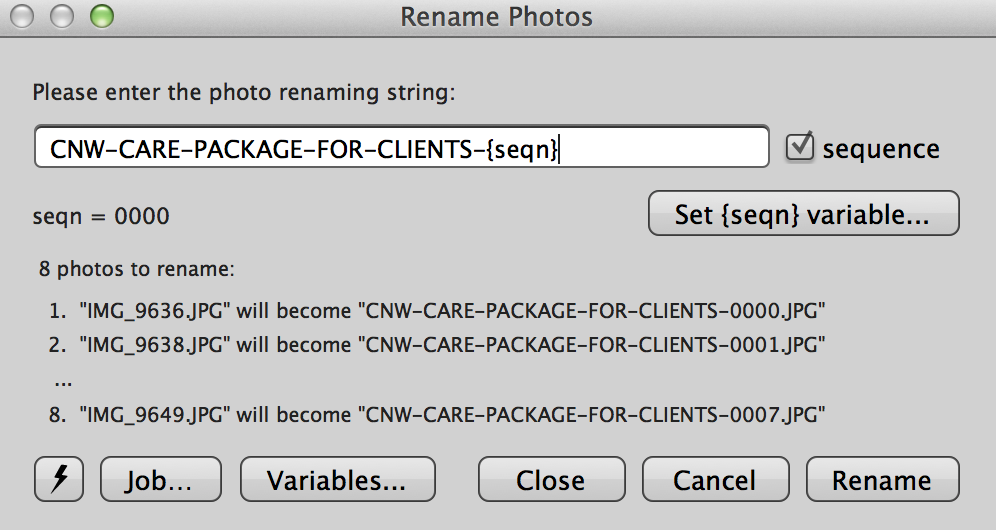
- The last step is to rename the files appropriately. Don’t rename your files on your SD card. To do this last step, you have to open your folder of RAW images in photo mechanic. You can do this by dragging the folder onto the photo mechanic icon in the dock or using command O. Once your folder is open, select all the files, and go to file > rename photos. We use a naming convention like this:
This whole process takes anywhere from 10 minutes to 1 hour depending on how many photos you have and how many times you’ve done it. We’ve gotten to the point where we can cull an entire 1,500 shot wedding in about an hour. After you’ve done it for a while, you know what you’re looking for and it makes the process really smooth.
We used to dread this part of the photography post production process, but using photo mechanic and the method outlined above, it’s actually become pretty fun. It’s the first time you see how an event is shaping up.
Next, we move onto importing the photos into Lightroom and getting started with the basics of Lightroom.
