
A photo booth is a great addition to any party. Think about those first few minutes of a party, you know before the booze kicks in, everyone is kind of standing around. The photographer comes around and snaps a shot or two with some bruschetta hanging out of your mouth. It’s all very, well, not exciting.
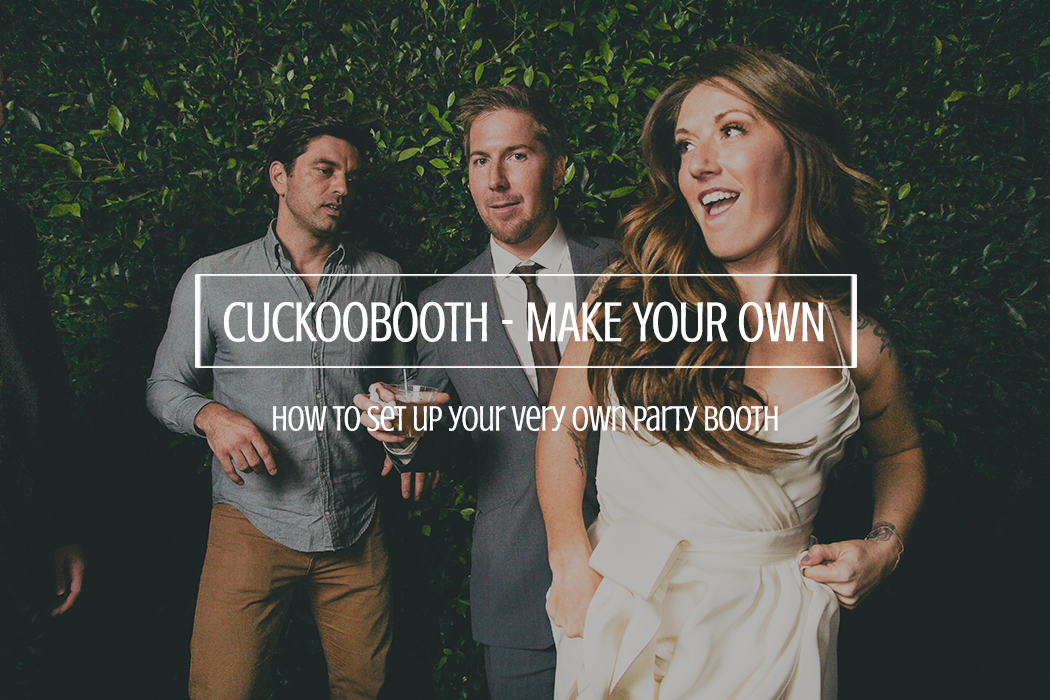
Cue the CuckooBooth.
It’s ready. It’s set up. The lights start flashing. People start throwing funny props on. Next thing you know there’s a long line and memories are being made — the kind you want to hold on to.
It’s a big reason why we encourage all of our clients to at least consider the CuckooBooth as part of their photography package.
But, this post isn’t for them. This is for serious photographers interested in setting up their own version of the CuckooBooth. Let’s get started.
Wait…
One note, before we get into it. This isn’t easy to do. It’s also not cheap. The reason we are sharing this is because when we originally had the idea, we had to piece together information from sources all over the internet and spent many [late] nights having our friends and family pose for hours on end.
This also doesn’t include everything that’s part of the package (you have to buy the CuckooBooth for those details) and doesn’t include the significant amount of hours spent in Lightroom achieving look and feel of the photos we share.
That said, this will cover the technical side of the set up. Without further adieu…
WHAT YOU NEED
• 1 Canon DSLR Camera (we usually use a 60D or T3I )
• 1 Canon DSLR lens (we used 18-55 F/4.0 for the demonstration below)
• 2 or 3 (minimum of 2) Canon Speedlites (slaves like 430EXIIs are perfect)
• 2 standard photography umbrellas
• 2 umbrella stands with strobe/flash mounts
• a backdrop of some sort (any flat wall works great)
• fun props – you choose
• people/subjects
• tripod for camera
• canon shutter release (optional)
WHAT YOU DO
Set everything up like the picture below (more details below)
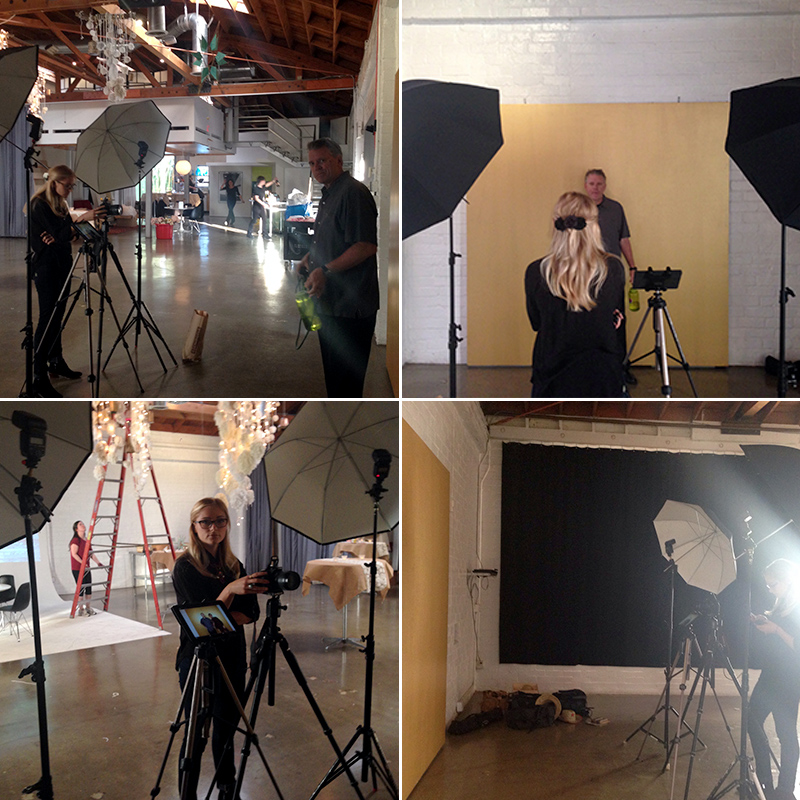
Step 1 – Set your camera on your tripod 8-12 feet away from your subject. This will vary depending on the room you’re in and the look you’re going for. This is where creativity and art comes in. Test it out a few times.
Step 2 – Set up your umbrellas on the stands about 2 feet to the left and right of your tripod/camera. Mount your flashes and aim them straight into the umbrellas (you’re going to be bouncing the light back onto your subjects).
Step 3 – Connect your Canon speedlites together wirelessly. This varies depending on the type of flash/cameras your are using. Our best recommendation is to watch YouTube tutorials that correspond with the gear you are working with. For example, we used 430EXII strobes so we used this video. It explains how to set up your Speedlites as slaves, which is exactly what you want to do to for this setup. It’s also great if you are using a camera with a pop up flash like the 60D or 7D. Then you can use your pop up flash as a third light source and as your master to control the slaves. It might sound confusing if you’ve never done this before, but grab the gear and start playing around. You’ll figure it out.
Step 4 – Set your subject in front of the wall and do some test shots. We usually shoot with a F stop of about 5 or 6 and the max shutter speed the camera allows for flash, usually 180 or 250. ISO can be anywhere from 100-400 and leave your AUTO FOCUS on, unless you want to manually focus every picture (which, you probably don’t).
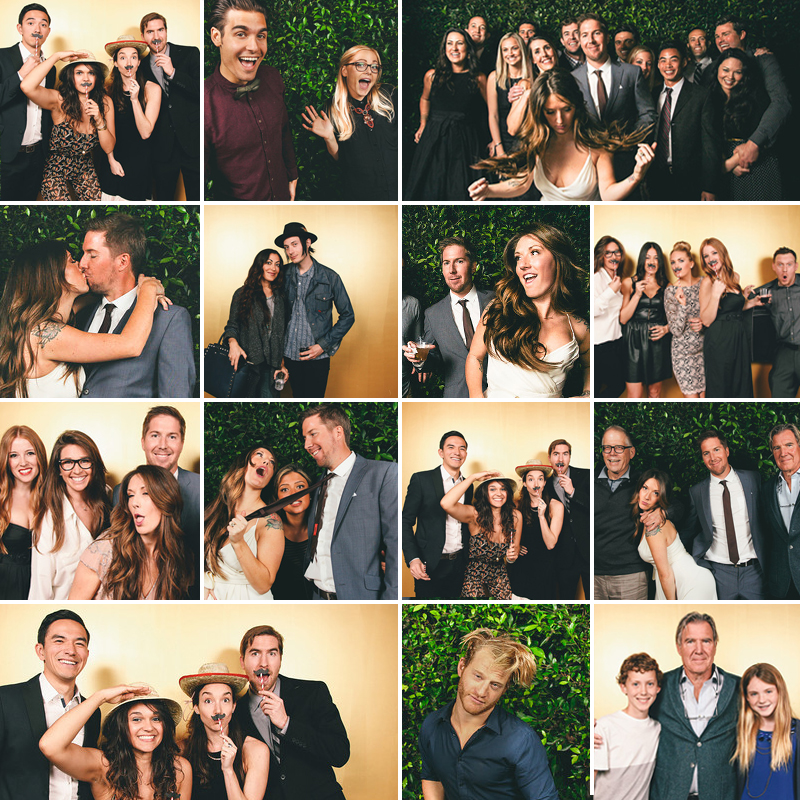
If you’ve done everything properly, you should get images that look something like this:
Like the idea and don’t want the hassle of spending a lot of money and doing all the work? Click here to get the CuckooBooth at your event.
Note: This will work with Nikon, too, but we don’t have Nikon gear so we don’t know the details.
Note 2: There are definitely other ways to achieve a similar picture / look and feel. This is just the best way we’ve found.
Addendum: A lot of people have questioned why we are “giving away” our knowledge on how to set up the CuckooBooth for free. They worry that we will potentially lose clients because someone will just set this up themselves. The reason we are “giving this away” is three-fold.
1) Philosophy and Mission – It’s part of our philosophy and mission to make the world a more creative place. Rather than hoarding ideas, we think they should be shared. If that causes us to lose a client, so be it. We’re playing the long game and believe that when we live according to that philosophy and those principles, we will be far better off 5-10 years from now.
2) Chances of losing a client are actually really low – If someone has all of the gear needed for the CuckooBooth lying around, they are probably already a professional photographer and know the majority of what was shared above. Even if a potential client has a friend with this equipment and is willing to set up their own photo booth as a favor, or for free, they still won’t be getting the full benefit of our product… which leads to the last point.
3) Editing and delivering photos – When someone does something for free or as a favor, the chances of you receiving high quality media edited with professional software drops exponentially. The point of the CuckooBooth is to capture all the memories from your event, and if you don’t have a professional team to oversee everything, you are probably wasting your time.
[mailchimpsf_form]